
Introduction
As a web hosting provider, one of our top priorities is ensuring that our clients’ websites run smoothly and are always available to their visitors. However, as websites grow and traffic increases, so does the need for additional storage space. This is where disk resizing comes in.
In this blog post, we’ll go through the process of resizing the disk for one of our Ubuntu 22.04 servers running a few WordPress websites in Proxmox.
By following these steps, you’ll be able to increase the available storage space for your WordPress sites without the need for additional hardware.
Whether you’re experiencing performance issues due to a lack of disk space or simply want to prepare for future growth, this guide will provide you with the knowledge and tools you need to successfully resize your disk in Proxmox.
We typically aim for at least 50% free disk space on our hosts at all times. So we will increase from 64GB to 96GB in this guide.
Adding extra disk space in Proxmox
- Run ‘lsblk‘ to list information about all available block devices on your VM you’ll see that a 64GB is currently in use.
$ lsblk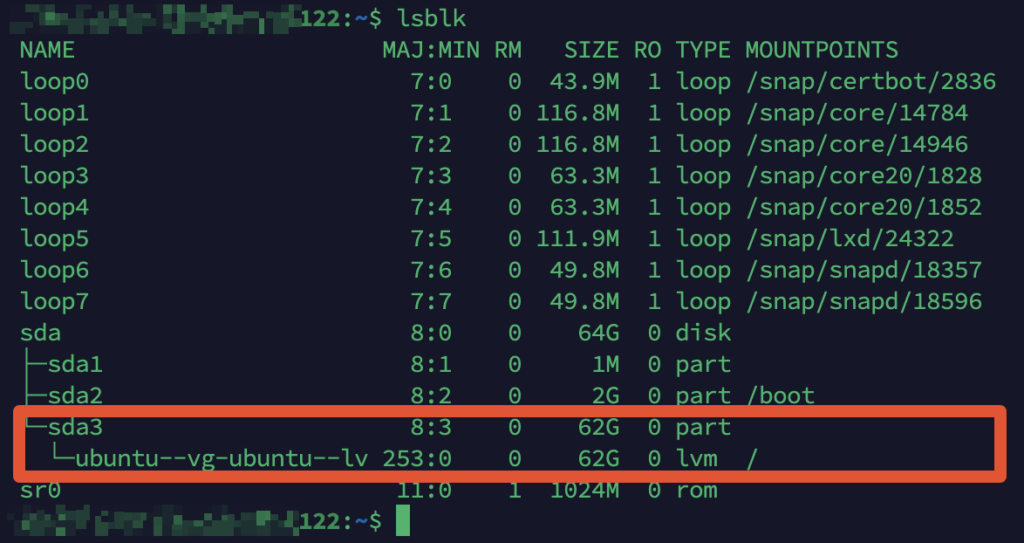
- At this point, I usually make a snapshot of the VM. I also ensure that there is a recent backup of the server.
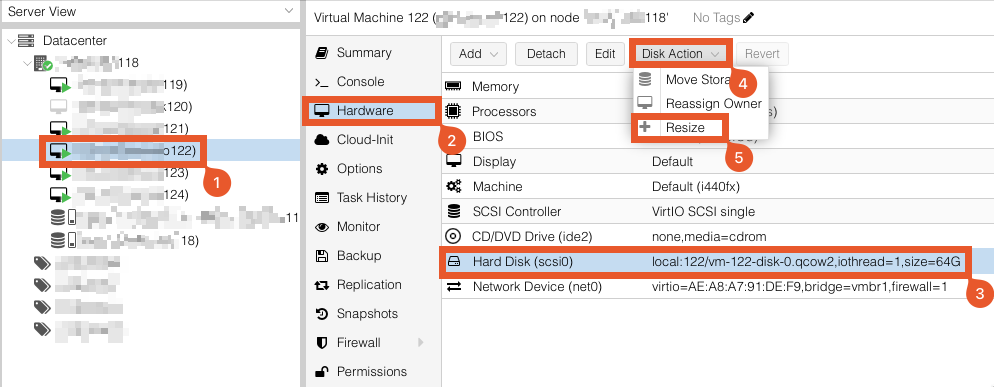
- Increase the disk size in Proxmox for your VM
- Select your Virtual Machine
- Click on ‘Hardware‘
- Select the disk that needs increasing
- Click ‘Disk Action‘
- Click ‘Resize‘
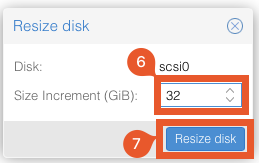
- Add the required increment. In our case we are adding 32GB.
- Click ‘Resize Disk‘
1

Resize the partition in Ubuntu
You’ll see that if you run sudo ‘fdisk -l‘ that there is 96GB available but only 62GB avaialble for use. In The following steps we’ll utilize the remaining space.
- Run ‘sudo fdisk -l‘
$ sudo fdisk -l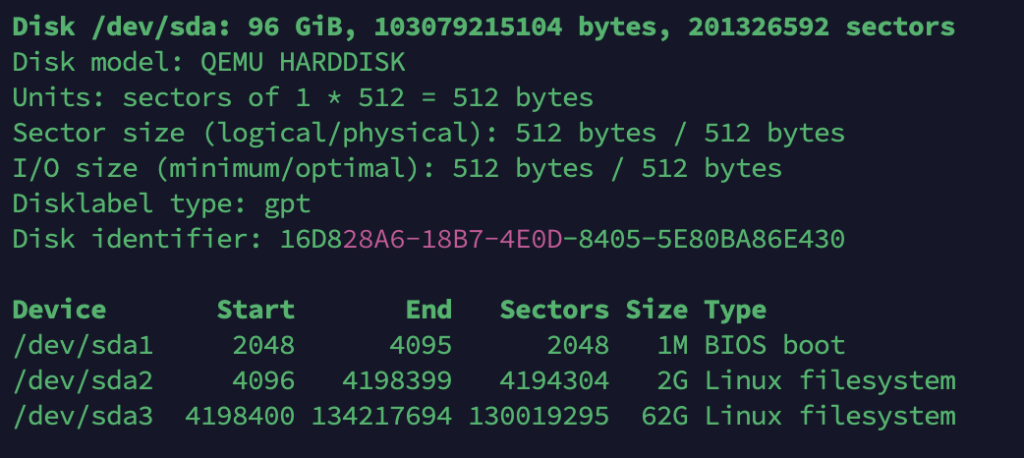
- Use growpart to grow the partition to the maximum size available.
$ growpart /dev/sda 3
- Use pvdisplay to display information about the volume.
$ sudo pvdisplay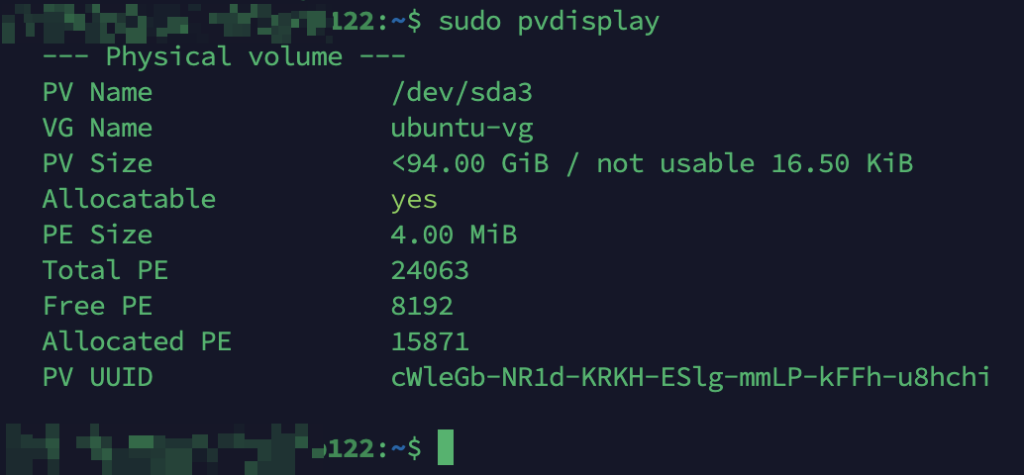
- The
pvresizecommand is a Linux utility that is used to resize a physical volume (PV) in a LVM (Logical Volume Manager) setup.
$ sudo pvresize /dev/sda3
- The
lvextendcommand is used to extend the size of a logical volume (LV) in a LVM (Logical Volume Manager) setup.
$ sudo lvextend -l +100%FREE /dev/ubuntu-vg/ubuntu-lv
- You can use the lvdisplay command to view the changed logical volume (LV).
$ sudo lvdisplay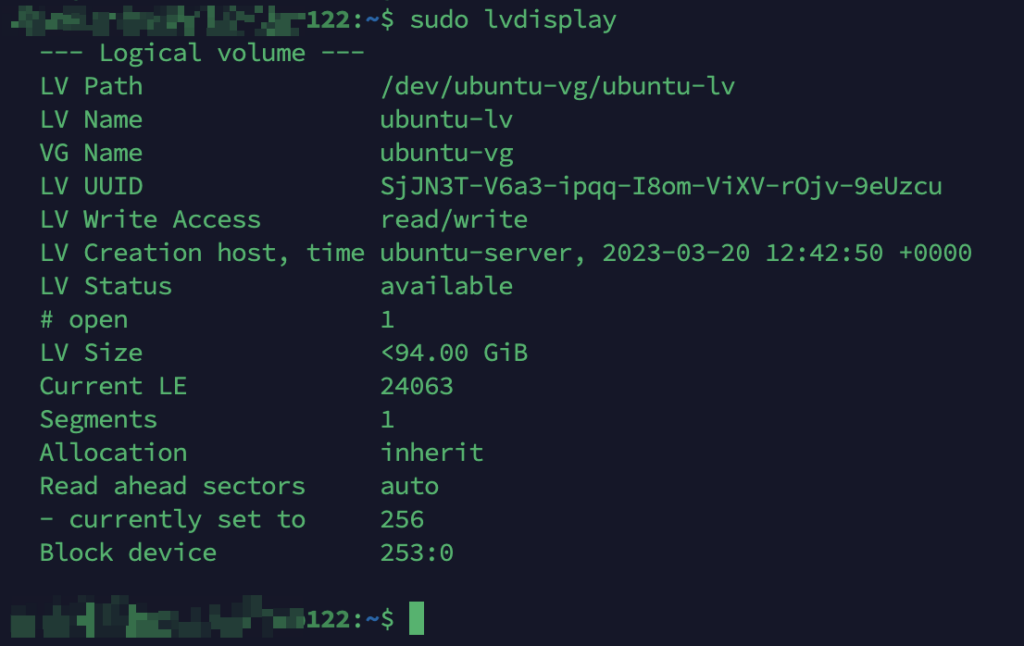
- Using the resize2fs command allows you to resize ext2, ext3 and ext4 file systems.
$ sudo resize2fs /dev/ubuntu-vg/ubuntu-lv
- you can use the df and/or the lsblk command to see the changes you have made.
$ df -h
$ lsblk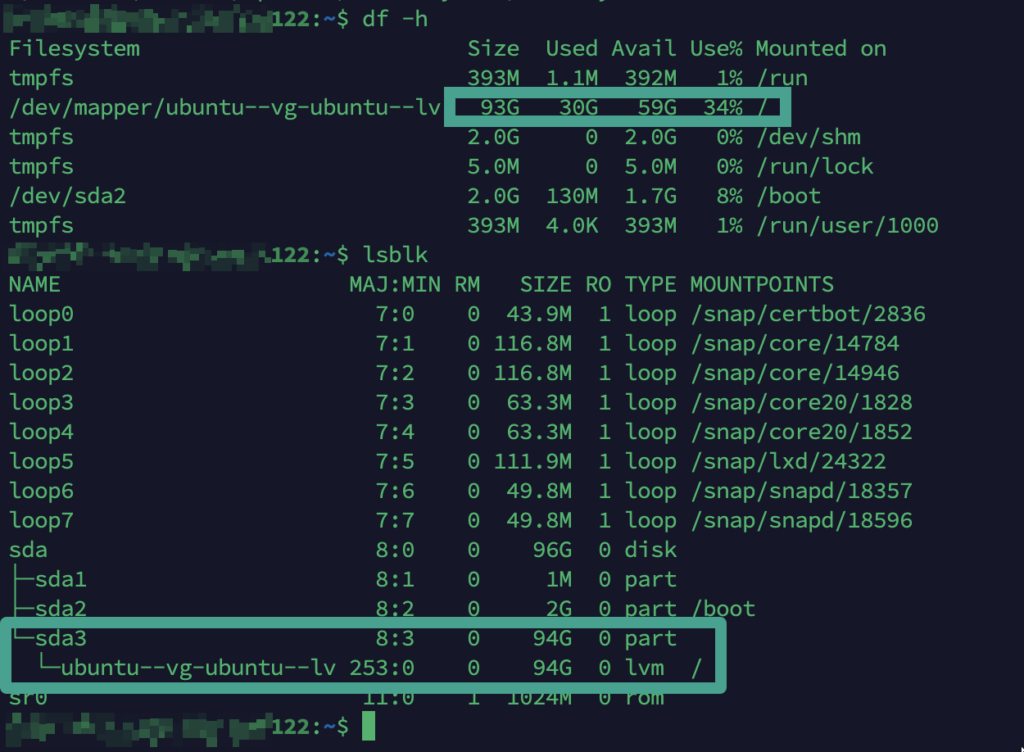
- Once everything is looking good, remember to delete the snapshot on your Proxmox environment.
Conclusion
In conclusion, resizing the disk in Ubuntu 22.04 is a straightforward process that involves a few key steps. By using utilities such as lsblk, growpart, pvresize, lvextend, and resize2fs, you can easily expand the size of your disk and extend your file system to accommodate additional storage needs on your system.
It’s important to keep in mind that when resizing disks or file systems, there is always a risk of data loss or corruption if something goes wrong during the process. It’s recommended that you make sure to have a backup of any important data before resizing disks or file systems.
By following the steps outlined in this guide and exercising caution during the process, you can safely and effectively resize your disk in Ubuntu 22.04 and ensure that your system has the storage it needs to run smoothly and efficiently.