WordPress is a great website and blogging platform that has become the most popular content management system in the world. It’s free, it works on almost any hosting, and you can use it for anything from a company blog to personal journal.
Installing WordPress is easy but if you’re not sure where to start, this guide will give you all of the information that you need to know about installing WordPress with Ploi.io.
Table of contents
A bit of info about ploi.io
Ploi.io is not like any other control panel software, it is a faster and better way of managing your server hosting. You no longer need to use Plesk or Cpanel to manage your websites. Since there is no unnecessary software installed on your web hosts you get amazingly fast websites and a very user friendly interface to boot. You can check out ploi.io here for more info.
Enough of that – this is how I set up WordPress websites using ploi.io.
Select a server in your ploi.io dashboard
Head over to ploi.io and Login. You’ll need to identify a server that has spare capacity for a new website.

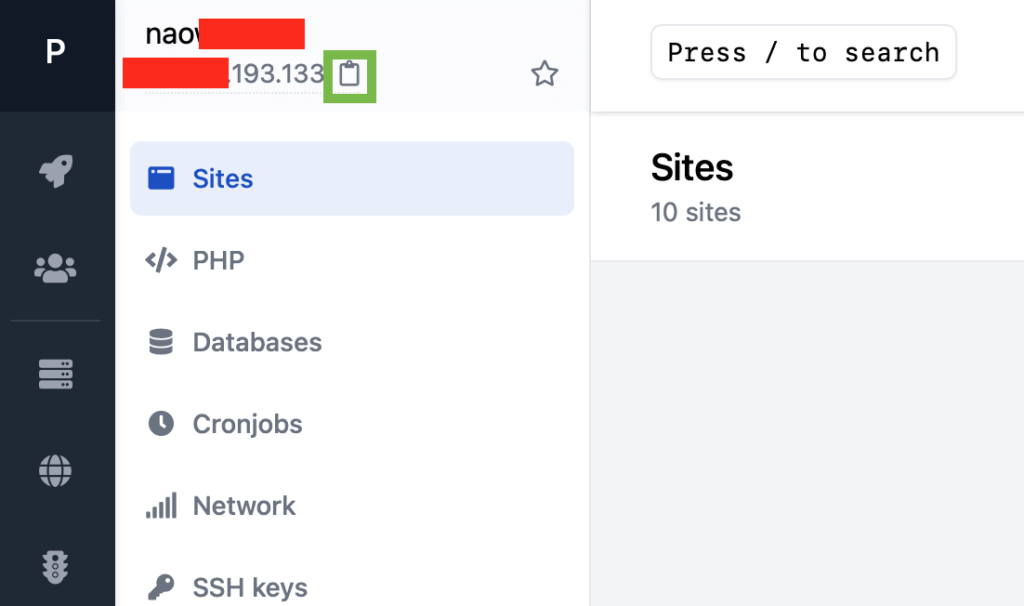
Grab the IP address of this server as we’ll need it for adding a DNS entry to your domain registrar. You can click the clipboard icon to copy the IP address.
Add a DNS Entry at your DNS registrar
Head over to your domain registrar and add a new DNS entry for the IP address you grabbed from the ploi.io dashboard.
You’ll need to provide the name of your website as well as its corresponding IP address.
For this example, I’m going to be using test.wpspidr.com since we’re only setting up a demo.
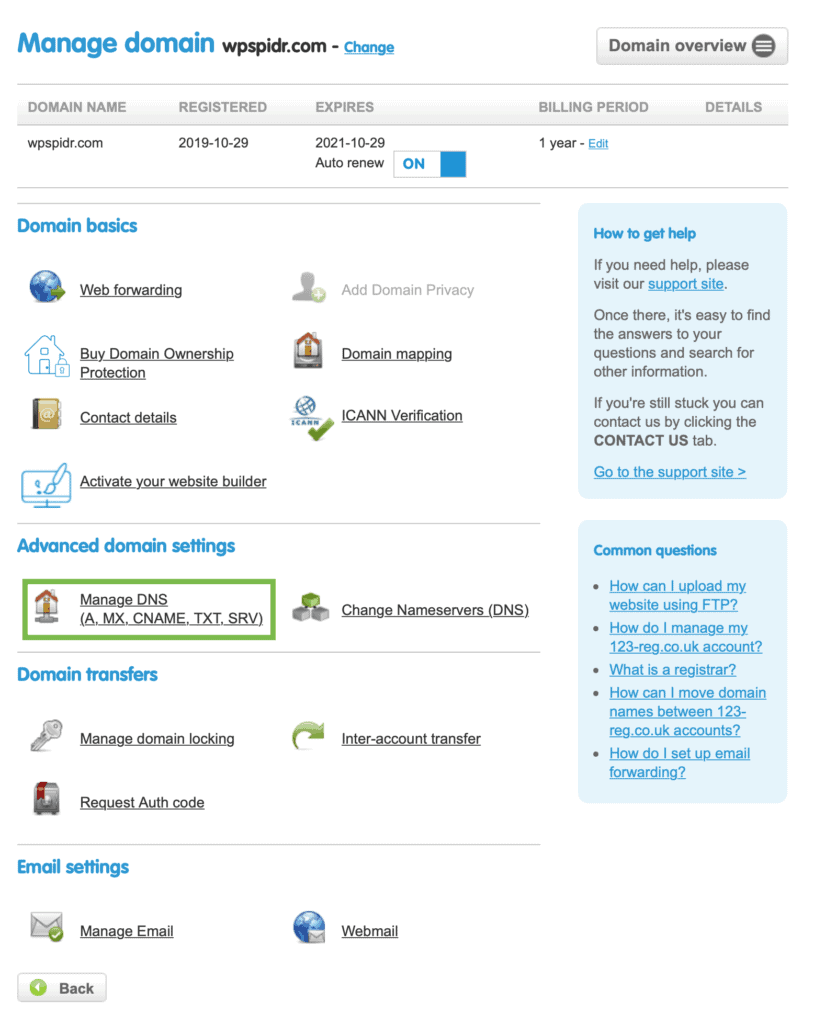
Im using 123-reg as an example here as that’s where wpspidr.com is registered. But most other domain registrars are the same steps.
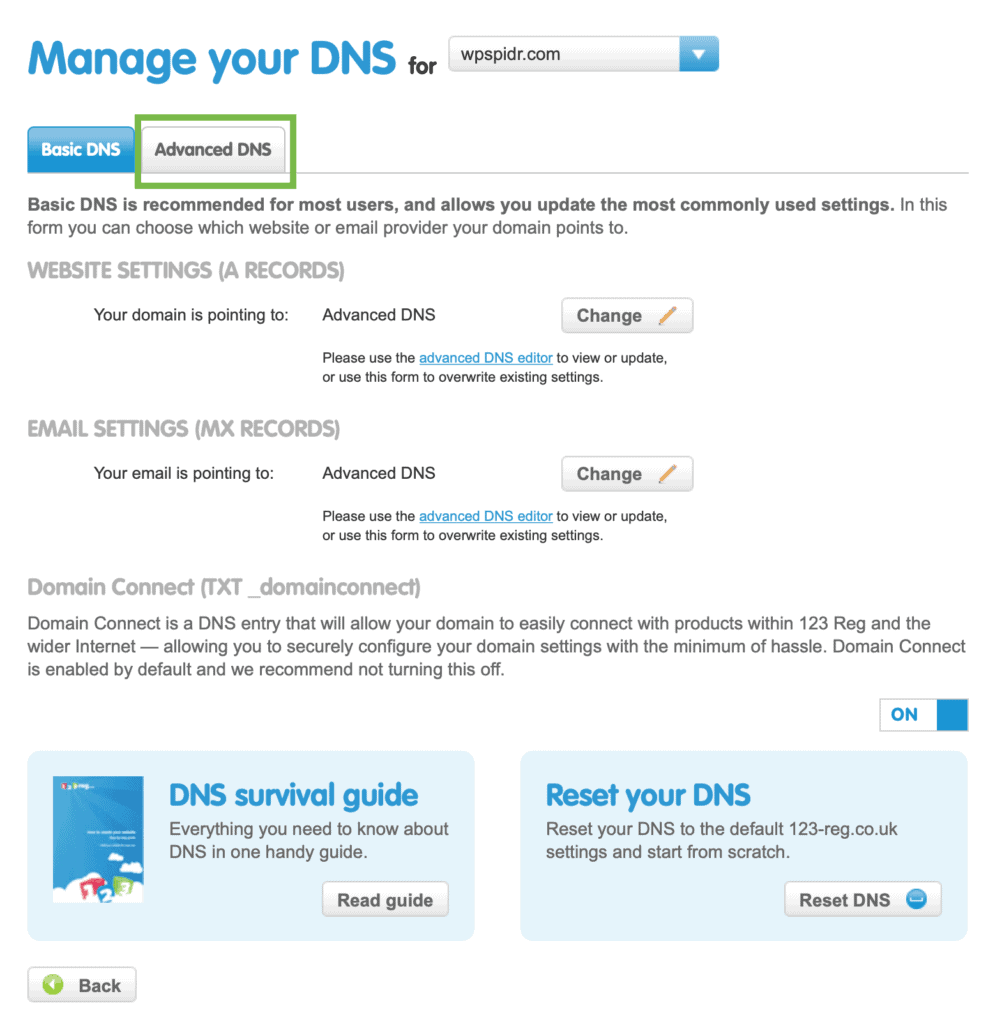
Go to Manage DNS, then click Advanced DNS.
You’ll need to decide on what you want your web address to be.
So in my case, I want it to be test.wpspidr.com
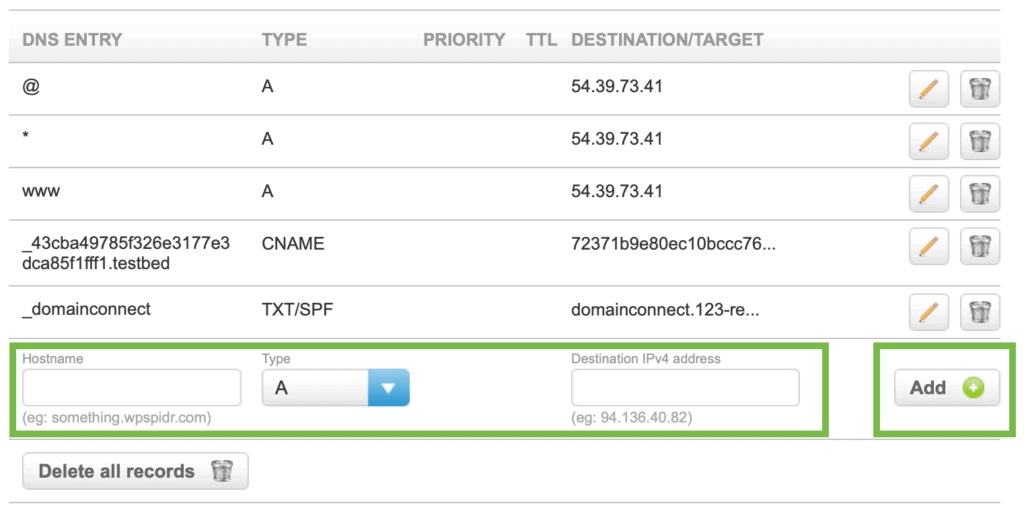
I will add the following record in DNS.
- A record
- Hostname – test
- IP – The IP in your ploi.io dashboard of the server that you want to install wordpress on.
Your record will look something like this:

But its more likely that you want to have a root domain or www for your website. If so, add the following records:
Root
- A record
- Hostname – @
- IP – The IP in your ploi.io dashboard of the server that you want to install wordpress on.
And add for www
- A record
- Hostname – www
- IP – The IP in your ploi.io dashboard of the server that you want to install wordpress on.
DNS can take up to 48 hours to propagate, but in most cases this can be fairly instantaneous. Give it 5 minutes and see if the changes are working.
You can check your DNS on DNSChecker.
Add a new site in ploi.io
Head back to ploi.io and ensure you’re on the correct server.
Type the domain you just set up in your domain registrar and click ‘Add Site’

This takes a few seconds and you should see your site listed under ‘sites’
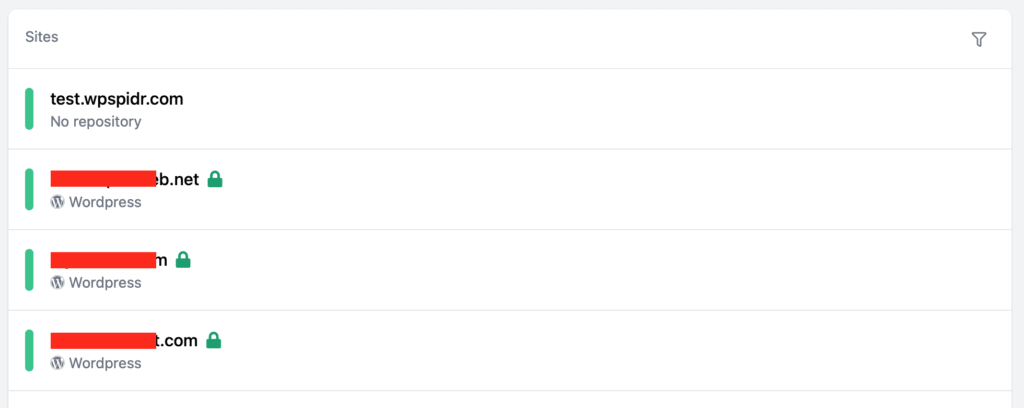
Click on your new site and we can now sort out the SSL certificate.
Install an SSL certificate from LetsEncrypt
Click SSL
Select LetsEncrypt
Ensure that your domain is correct. If you’re using a root or www for your domain, make sure you have both in this field, for example ‘wpspidr.com, www.wpspidr.com‘
Click Add Certificate.

In about 10-20 seconds your certificate should be installed. If it fails, you will get a notification telling you why. You can try forcing the request that skips DNS verification, but don’t do this too many times if it continues to fail.
The next step is to install WordPress.
Install WordPress
This can be done by clicking General Section and then click the ‘Install WordPress’ button.

Now click Create Database
Choose a random string of characters for the database prefix (This is required if you use database caching and you have multiple sites on the same server)
Now click install WordPress
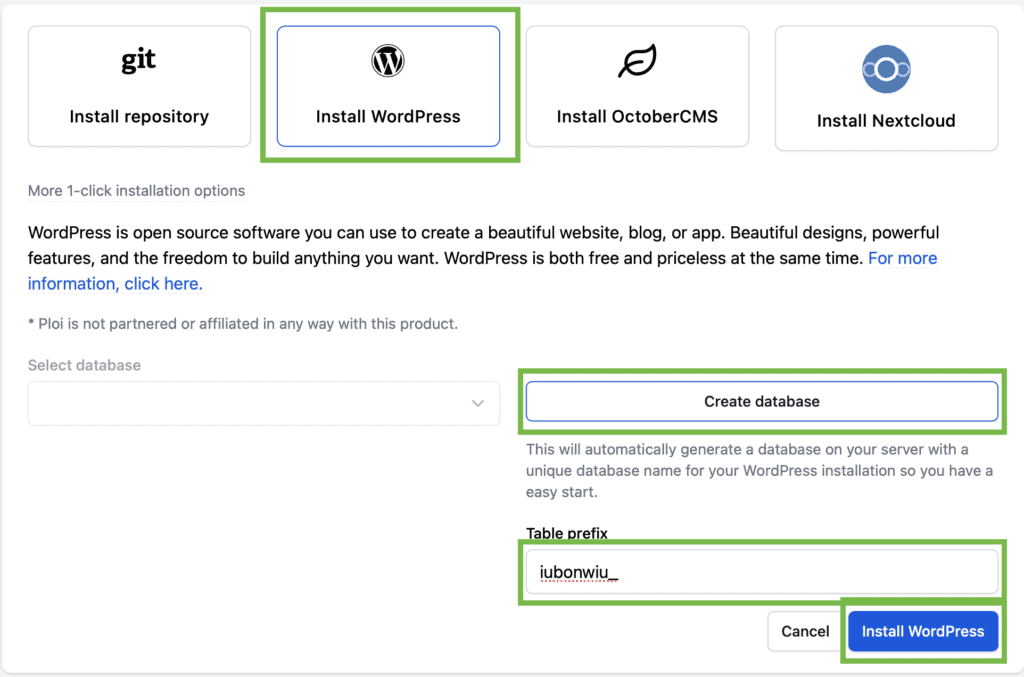
You will get a notification telling you that WordPress is installed.

Set Up WordPress
Now you need to set up WordPress. Open a new browser window or tab and go to your web address. (You should also notice that you have a secure connection identified by a padlock in your browser)
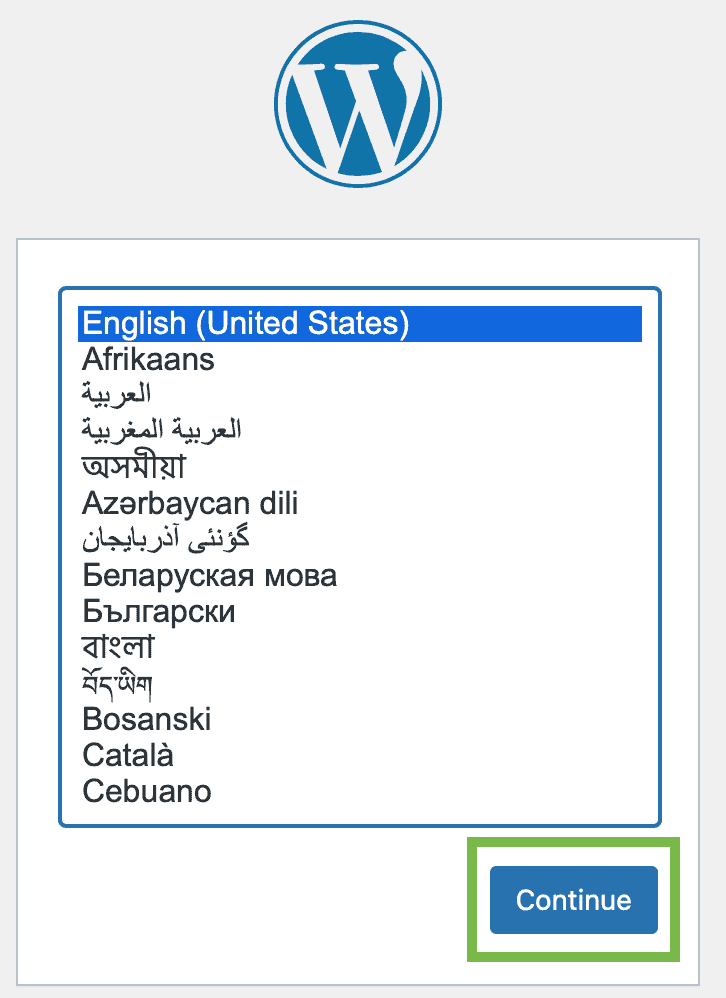
Select your desired language and click continue.
Now add a site title, your username (do not use admin), email address, password, and finally click Install WordPress button at the bottom of this screen.
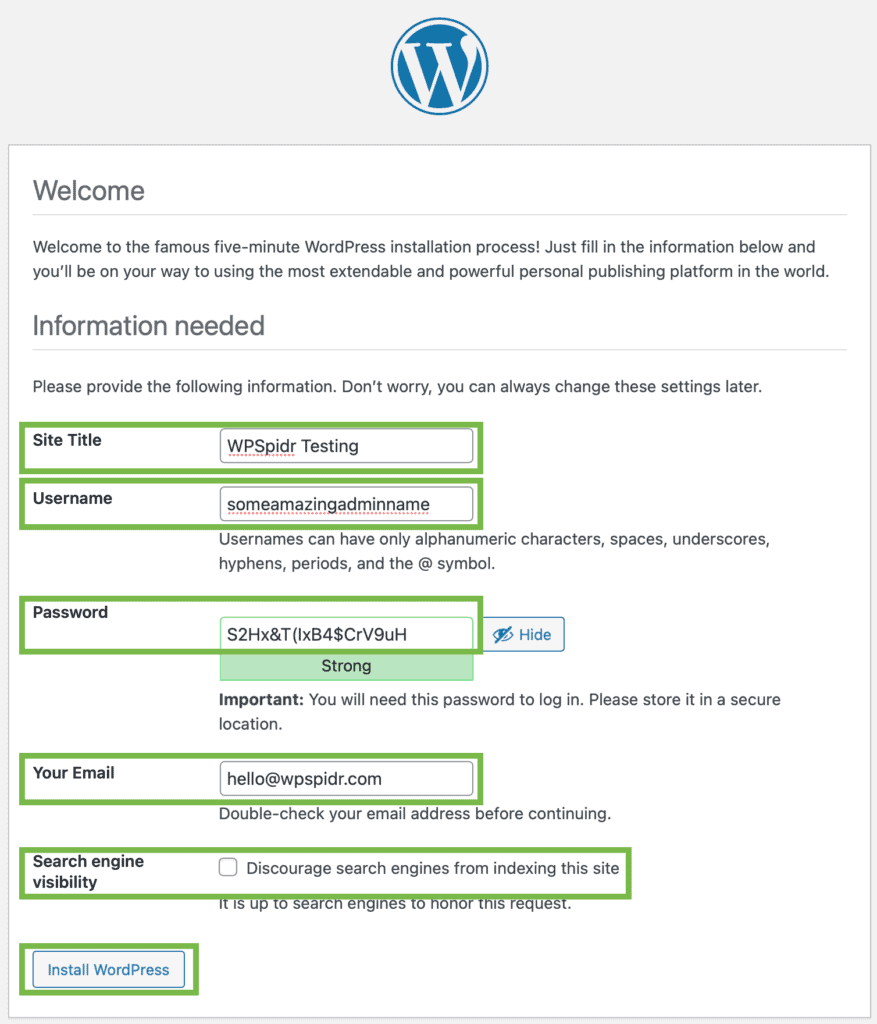
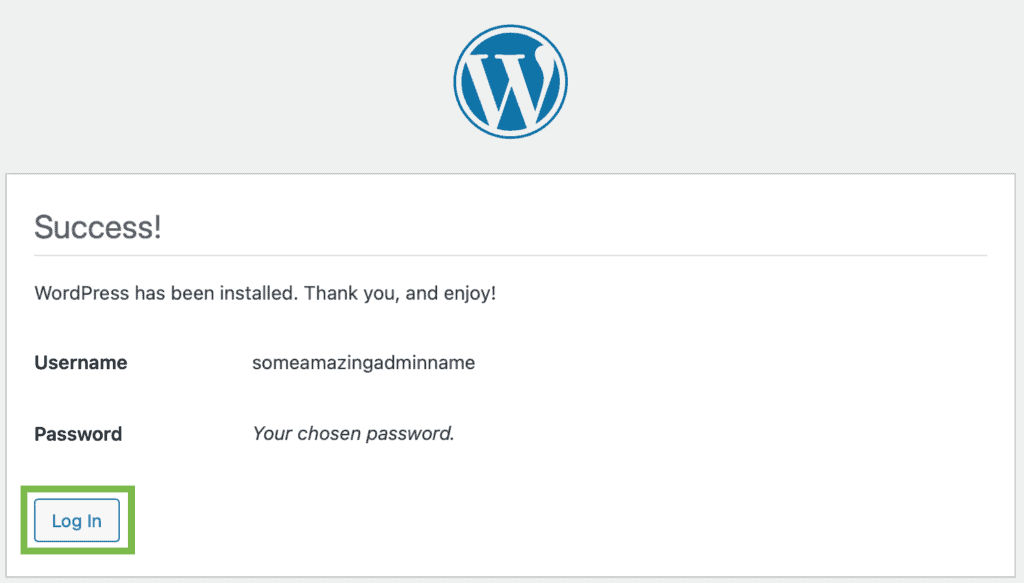
You have successfully installed an instance of WordPress using ploi.io
You can now click Log In and use WordPress
Recommended Plugins to use with WordPress and ploi.io
There are a few plugins that I like to use with Ploi and WordPress. I have listed them below here with a brief outline of what they do.
Redis Object Cache
Redis Object Cache is a plugin that caches WordPress objects which makes your site load faster.
It is an open-source, in-memory data store. WordPress can use Redis to store values generated by its native object cache so that cached objects can be reused between page loads.
Hopefully this post has given you a basic understanding of how to create your own website in ploi.io, install WordPress on it and set up the site with SSL protection. If you have any further questions about this process or need assistance setting up another type of domain name like .com, .co.uk or .org, please feel free to reach out to us for more information!
