Migrating a WordPress site from one ploi.io server to another is an easy process, but it does require some steps. In this post I will walk you through how I migrate a WordPress website that is managed by ploi.io.
I have a number of sites managed by ploi.io and occasionally there is a need to migrate a site across from one host to another.
The steps are pretty much the same as migrating any wordpress website, the steps below are purely focussed on ploi.io though.
The Server Setup
Both servers are identical and the configuration is the same.
Both are running:
- MySQL
- NGINX
- Redis Cache
- and any other standard ploi.io installed packages.
In this guide, ServerA is the source and ServerB is the destination.
WordPress Setup
This is a live website, so I will try to keep downtime to an absolute minimum. As It’s a customer site, I will obscure any identifiable information.
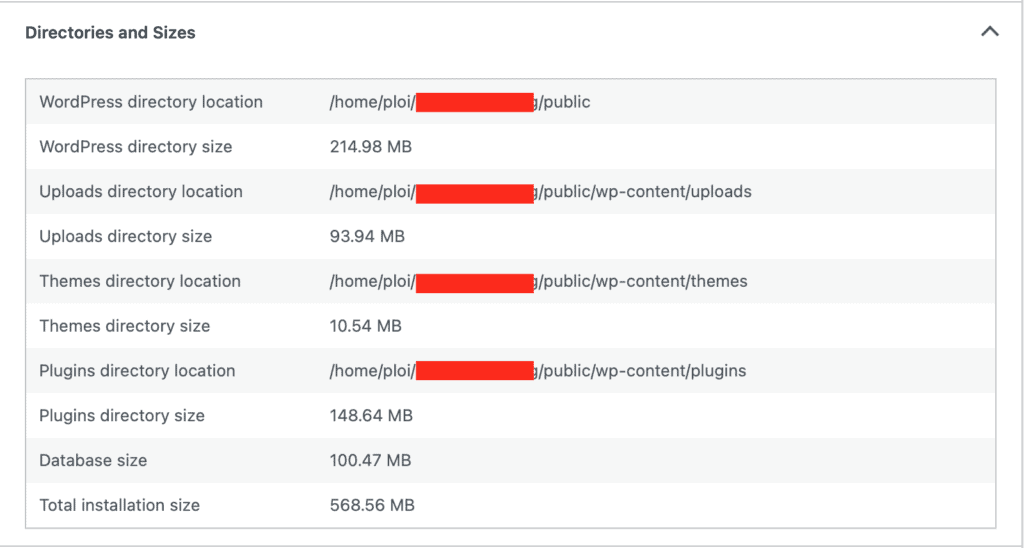
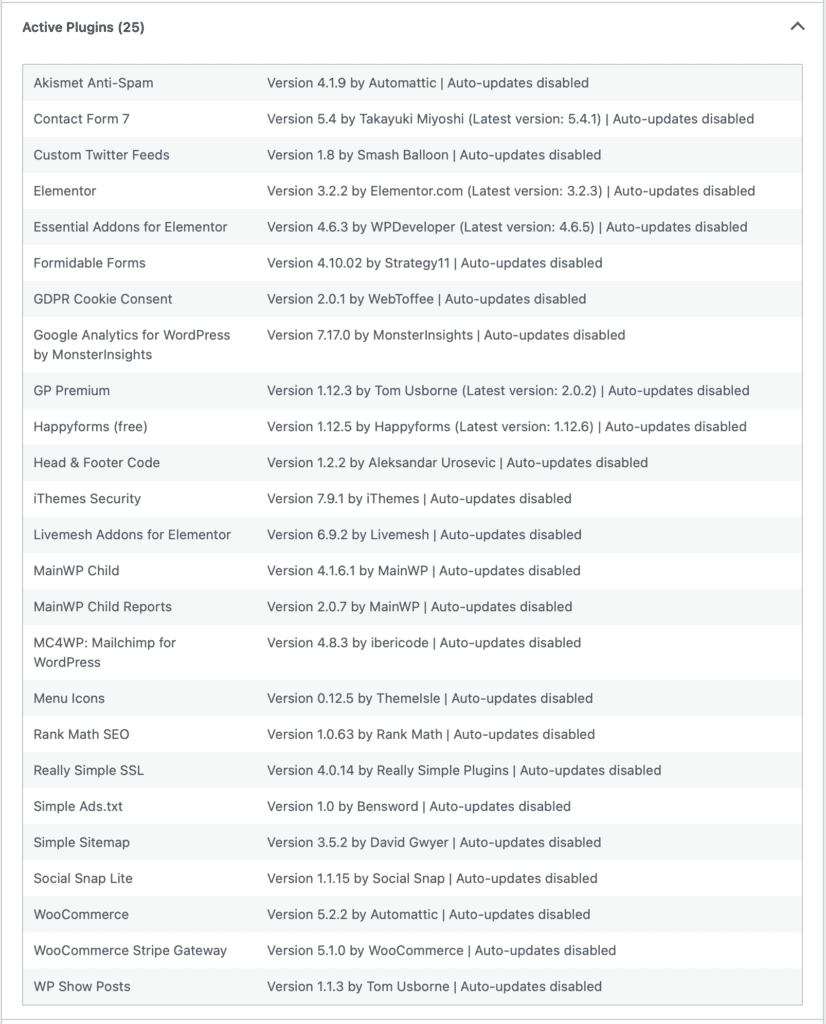
It is standard WordPress with 29 plugins installed.
Overview of planned move
So as an overview this is how I move the site from one ploi.io server to another
- Run a full backup using ploi.io
- Export database on ServerA
- Clone Site files (including exported database) from ServerA to ServerB
- Create identical database on ServerB
- Import database
- Change DNS & request SSL Certificate
- Set up backups
- Test and clean up
Backup using ploi.io
We have weekly full server Backups that are performed at a server level in case of a serious outage, but day to day backups are performed using ploi.io’s own in built backup feature.
File Backup
Find your site in ploi.io and go to Manage > File Backups
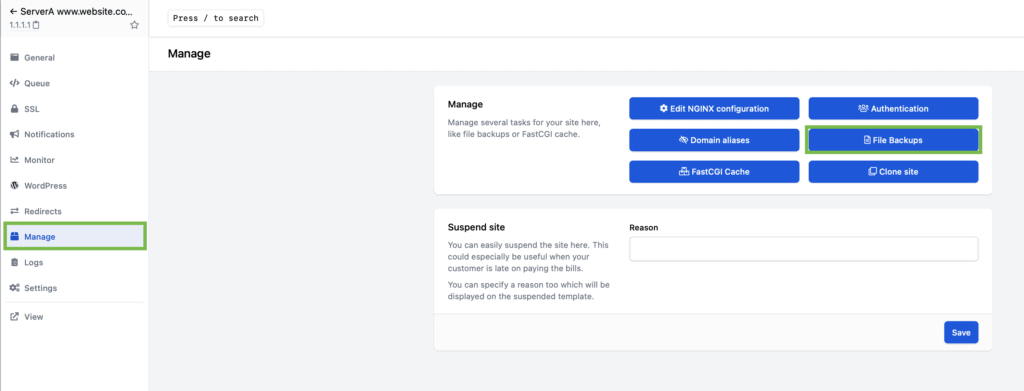
Click ‘Run’. Your site files will backup in the background.


Ours are going to google drive. So check Google Drive to see if the backup was successful.

Now that the file backup is successful, we now need to create a database backup.
Database Backup
On the same server in ploi.io, you can now go to Databases and click the menu item on the database.
Click Backups
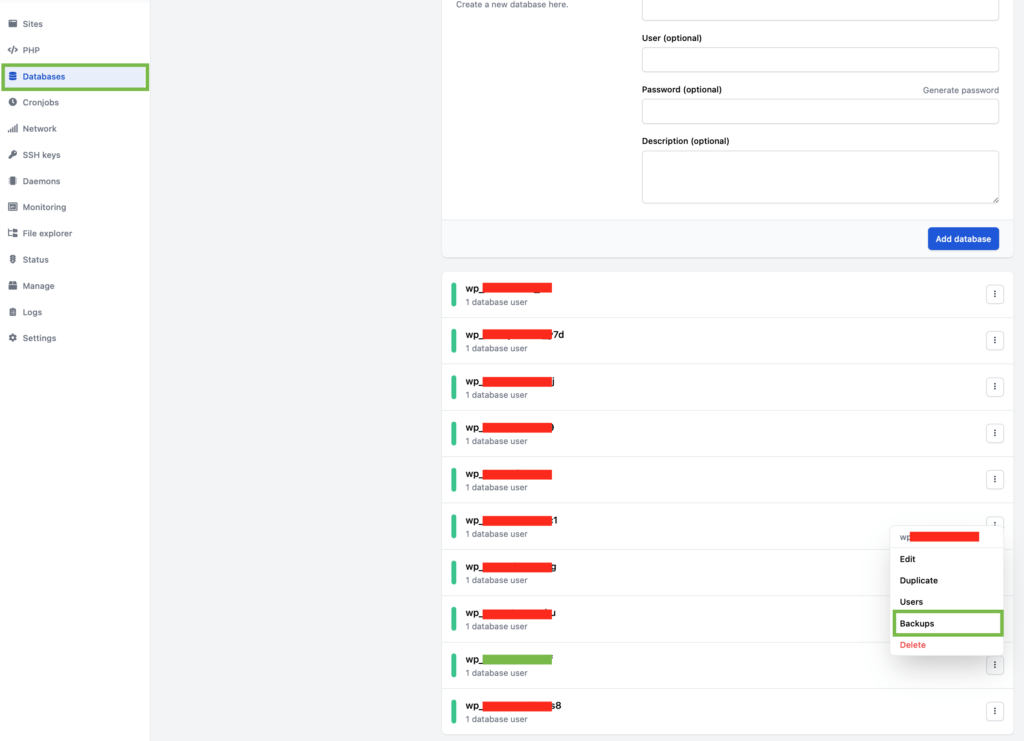
Now click ‘Run’.

As with the file backup – the database backup will run in the background.
Check the backup store again just to make sure that it has run.
Now that we’ve created a file backup and a database backup of our WordPress website, now it’s time to migrate our website.
Export database on ServerA
The quickest and easiest method to export a database is to use ssh. Ensure you add your SSH key to your server so you can gain access.
SSH into ServerA
# ssh [email protected]where 1.2.3.4 is ServerA’s IP address

run the following command to export the database to the root of your website
# mysqldump -u ploi -p wp_yourdatabase_abc > /home/ploi/yourwebsite.com/public/wp_yourdatabase_abc.sqlreplace your username and database name where necessary.
You will be prompted for a mysql password, you will find this in the email sent to you by ploi.io when you set up your server.
If you browse to your site location, you should be able to see your database export there.
Clone Site files (including the database) to ServerB
Since we have already exported the database into the root of the existing site, you can use ploi.io’s built in feature to clone the site files.
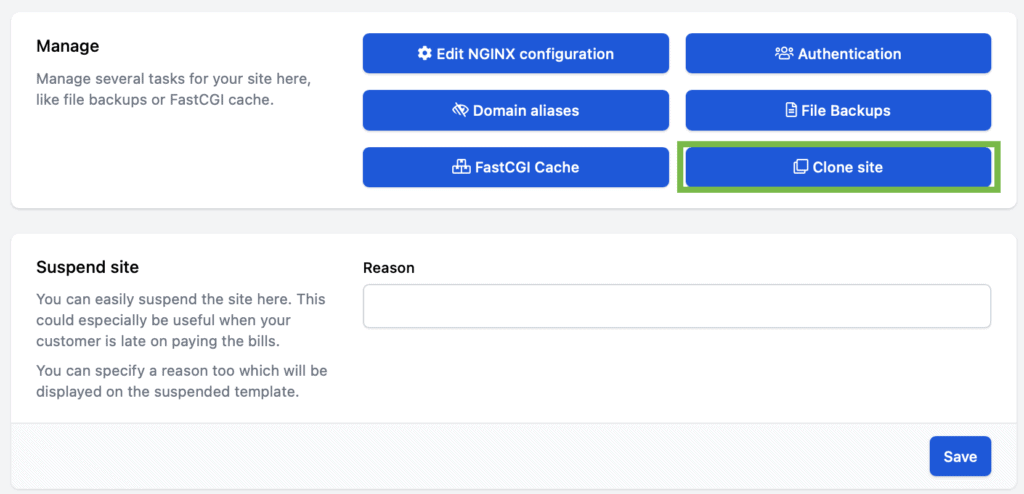
Go to your site and then ‘Manage’
Click Clone Site
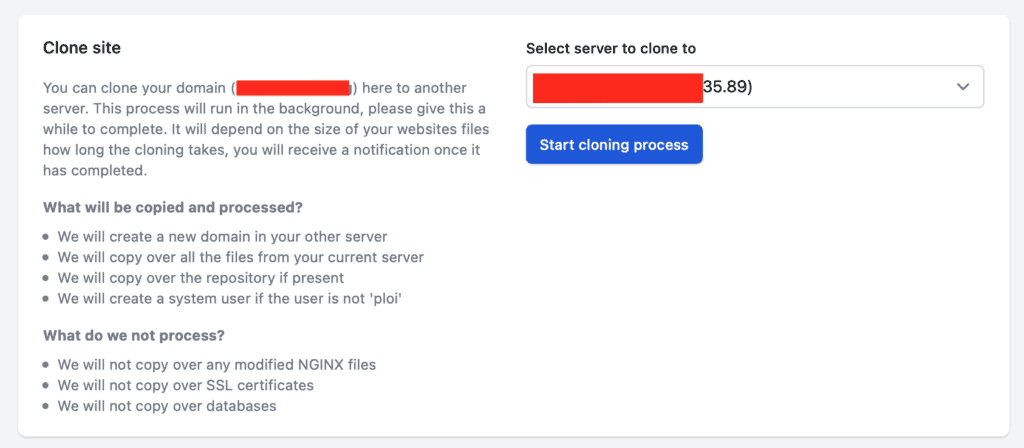
Select the server you want to clone to
now click ‘Start Cloning Process’

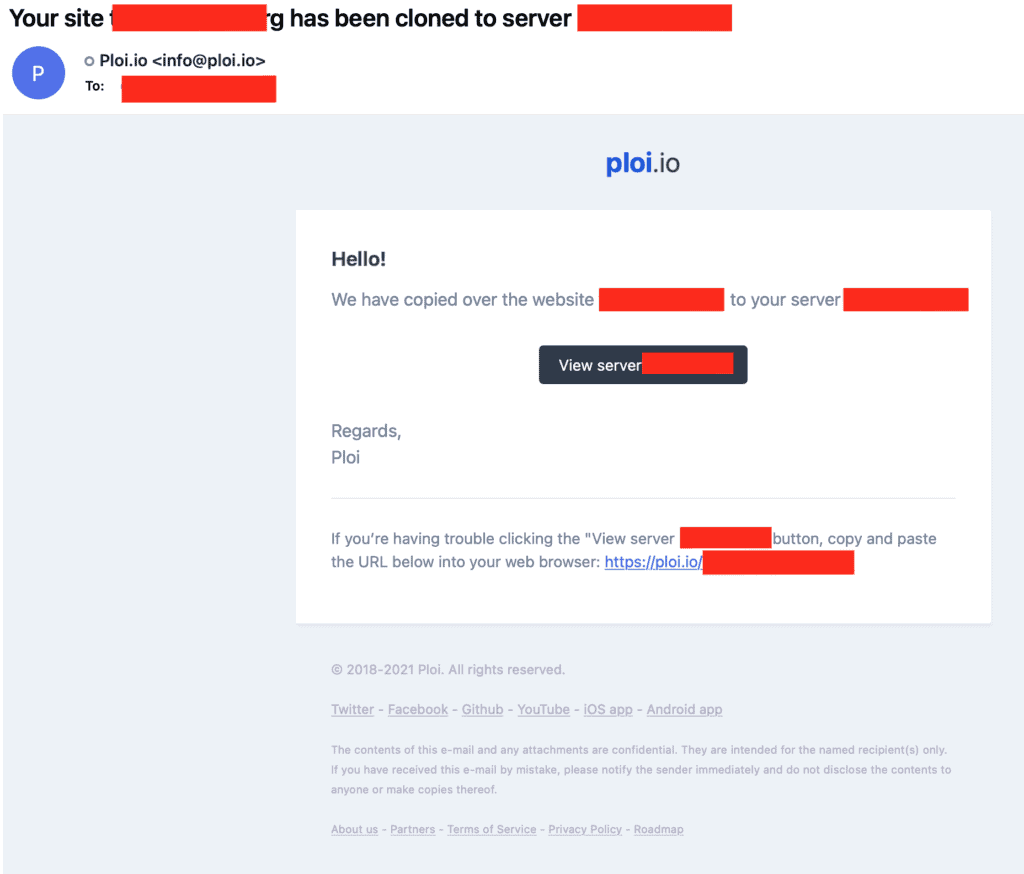
Your site files and exported database will now start cloning across to ServerB. You will receive an email from ploi.io when the process is finished.
Create new empty database on ServerB
If you open up the wp-config.php file on your source server you can grab your previous credentials for the WordPress Database.
Go to ServerB > databases in the ploi.io dashboard
Copy and paste the info from wp-config into the relevant fields when creating a new database.
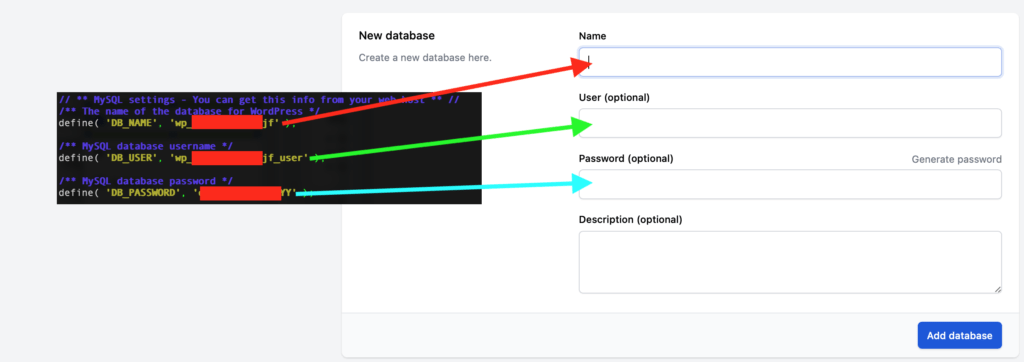
Now click ‘Add Database’
Import database to ServerB
Now SSH into ServerB
# ssh [email protected]where 3.4.5.6 is ServerB’s IP address
Run the following command. You will need your MySQL password that was sent to you when you set up your server.
#mysql -u ploi -p wp_yourdatabase_abc < /home/ploi/yourwebsite.com/public/wp_yourdatabase_abc.sql
Change DNS Settings and get a new Certificate
This is the step that will redirect all traffic from your old ploi.io ServerA to ServerB.
Go to your name registrar and change necessary IP’s from the old IP of ServerA to the new IP of ServerB
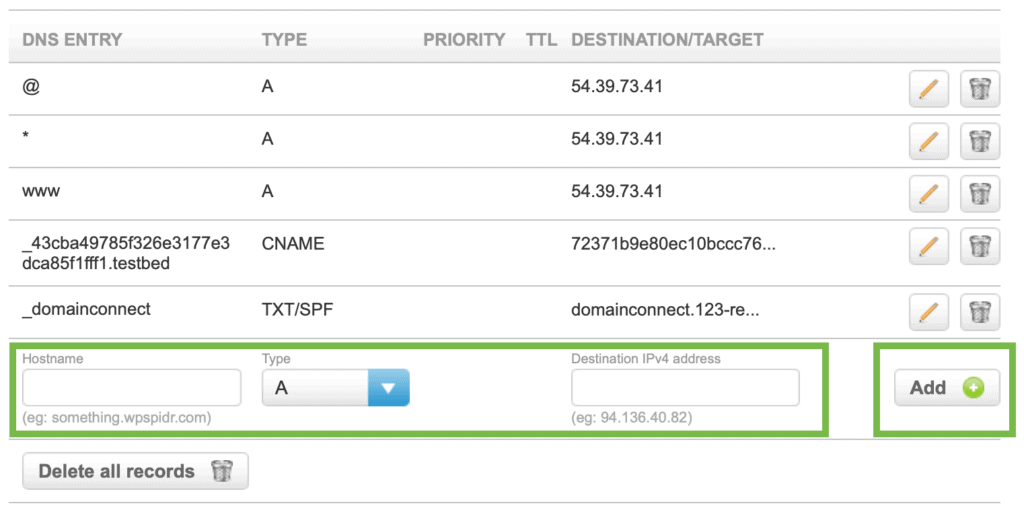
Wait a few minutes, and you can now request a new certificate from LetsEncrypt. Navigate to your new site in ploi.io and clicks SSL > Add Certificate.
Set up Backups
Now its time to set up your backups. Remember to set backups for both your files and your database. Choose a retention period that is appropriate for your site. The default for me is:
- Files – weekly backup, 90 day retention
- Database – daily backup, 90 day retention
Test and Clean Up
Now fully test your site. You may need to resave permalinks, but every time I have migrated a site with ploi.io, I have never needed to.
Check over your site to make sure everything is in place. Might be worth checking the Health dashboard within WordPress as well.
Once you’re happy, you can now delete the database export that is in the root of your website on ServerB.
via SSH,
# rm wp_yourdatabase_abc.sqland that’s it, you have successfully moved a wordpress website with ploi.io.
Conclusion
That’s it! You should now have a fully-functional copy of your website on ServerB, with all the same content and features as before.
Before you go live, though, remember to test everything thoroughly because there is nothing worse than finding you have something amiss.
